Eh...well...that title rather isn't in my line, but I guess it works for today. :D
I spent Tuesday and Wednesday making a dress. It's red print. If you've known me for a while, you probably know red is my most favorite color, followed by certain bright, dark shades of green. But anyway, I actually remembered to take those boring in-progress pictures I love to post so well. I had intended on doing so when I make my outfits for the FCM conference, but I just didn't.
Alright then, to get started...
The Pattern
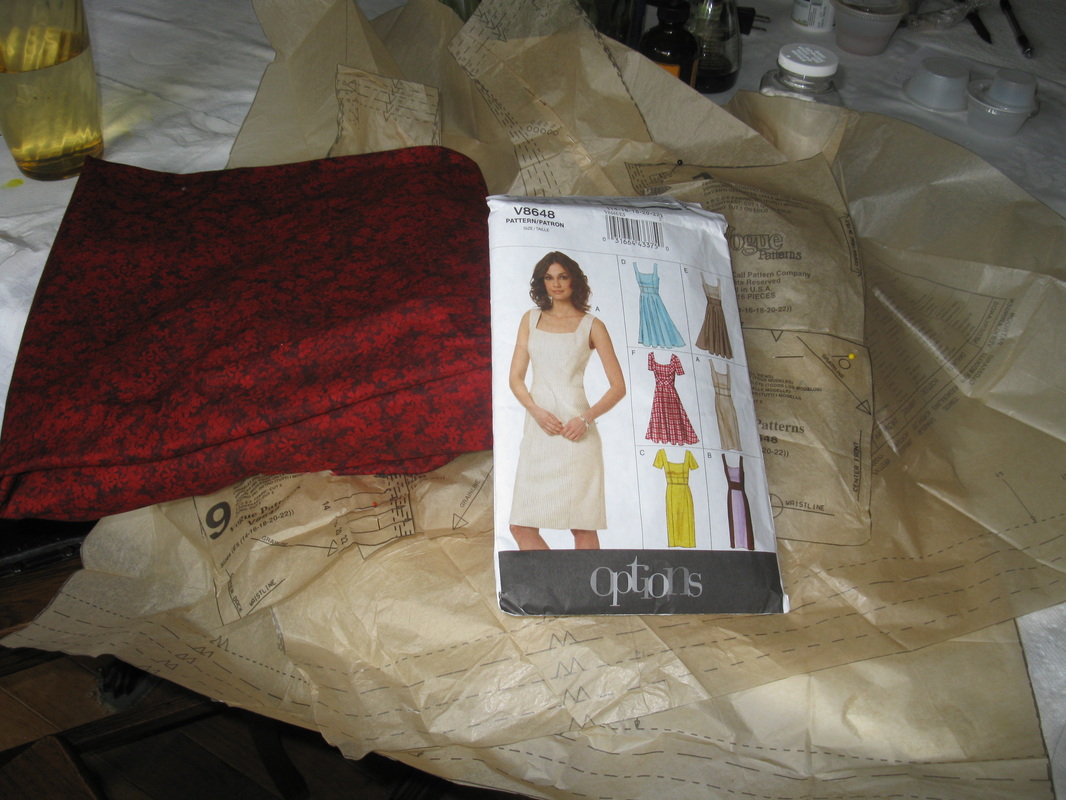
I bought this Vogue pattern on-sale, over a year ago at the Jo-Ann's in PC. I got the fabric the same day. I went home, intending on making the dress that week (or the next) and even cut the pattern out. However, I just never could seem to pin Savannah down when she was open to fit me. So...it didn't happen until Tuesday after lunch. I hadn't intended, when I got up Tuesday morning to start a sewing project, but it seemed like a good idea what with the rain and all that I just went ahead and jumped into the project head first.
I went with option D--sleeveless with a full skirt. I love full skirts for a variety of reasons...and sleeves, particularly tight sleeves tend to bind me something terrible...
I laid the bodice out and pinned it, leaving room for the lining. (The bodice is lined and the skirt was supposed to be too, but I didn't do that.) I didn't cut anything yet and went to put the skirt on. I nearly freaked out because there wasn't enough fabric! I think I had already had two run-up-the-stairs-to-consult-with-Savannah moments already, but this one was the most agitated yet. "What do I do? I really want the full skirt."
Well, we got the pattern cover and a-duh! The bodice lining was to be cut from different cloth. The dress itself, minus the lining, called for 3 1/4 yards (or something like that), so that is why, with the proper measure of fabric, with the lining laid out on it as well, it didn't fit. I scrounged in the doll dress fabric foot-locker and came out with yard of black broadcloth that would work perfectly for the lining. Once I pinned the bodice on the fabric and cut it out, I was thrilled to see that I was able to add an extra four inches onto the skirt length! (The pattern came right to the middle of my knee and I wanted it longer than that.)
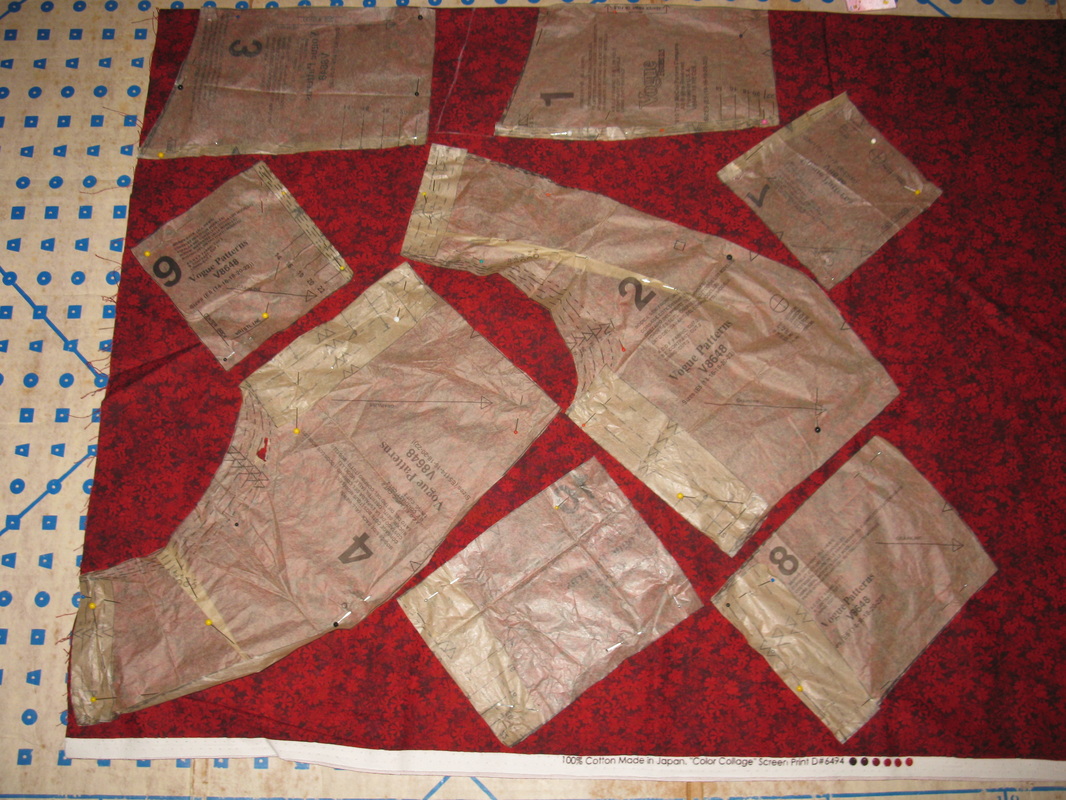
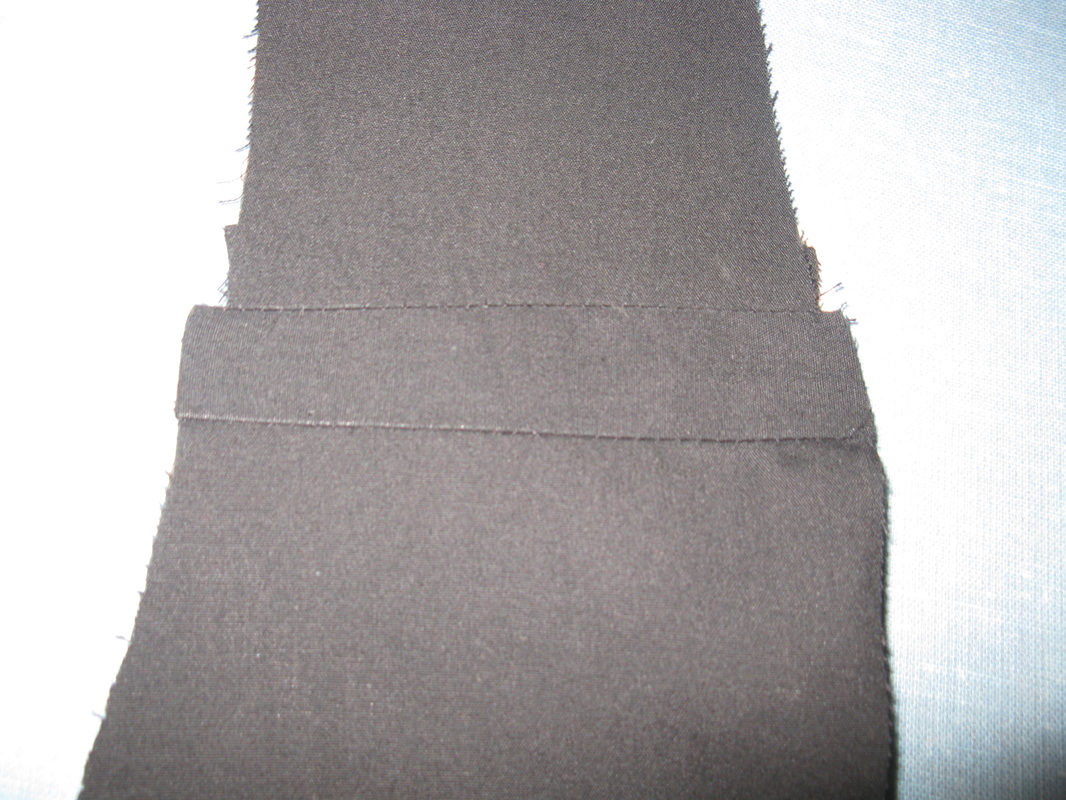
I cut the front up two inches (pattern piece 1). Next time (presuming there is a next time), I think I'd bring it up at least one more inch. I took a minute to scratch my head about how the bodice side front/back pieces (2 and 4) went on the fabric. I'm used to laying bodice pieces on the grainline, so off-kilter was an oddity to me.
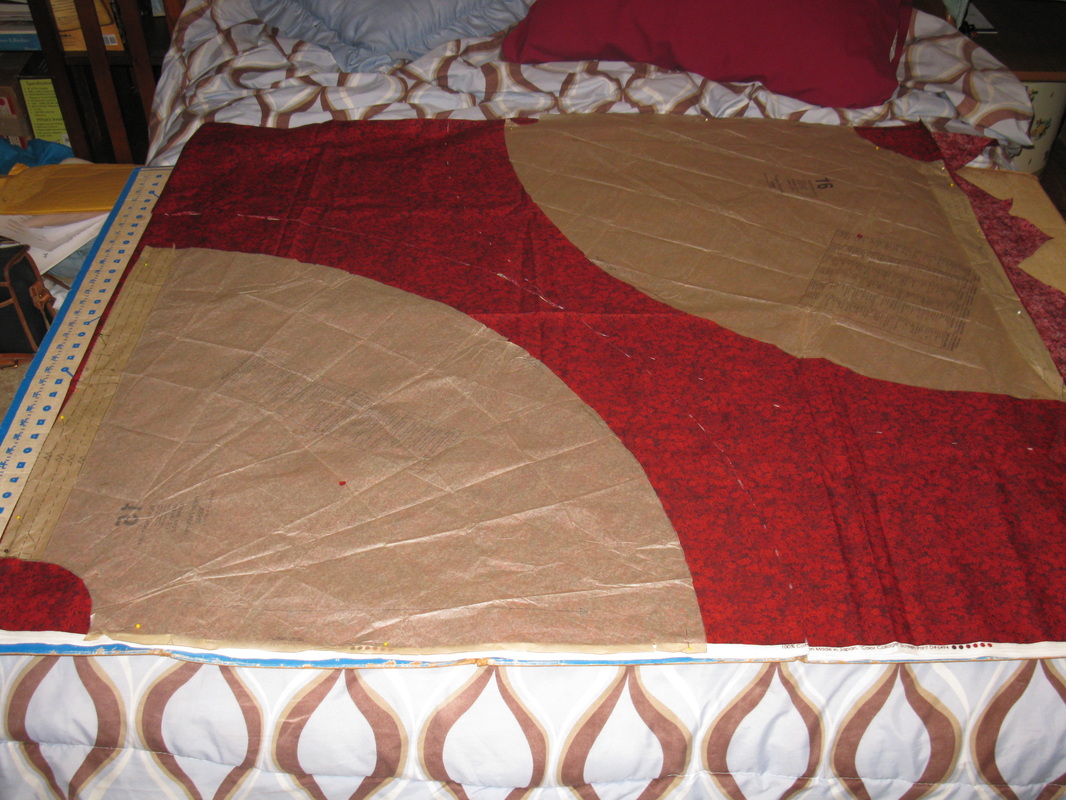
You can see my pencil marking for the added skirt length. After I had the bodice all put together and was fixing to stitch the four skirt panels together (the fabric is doubled), I realized that Savannah had told me to cut the skirt out to the next size bigger (because the waist had gotten expanded a little bit). Thankfully, with quarter inch seams at the sides, it fit the bodice perfectly!
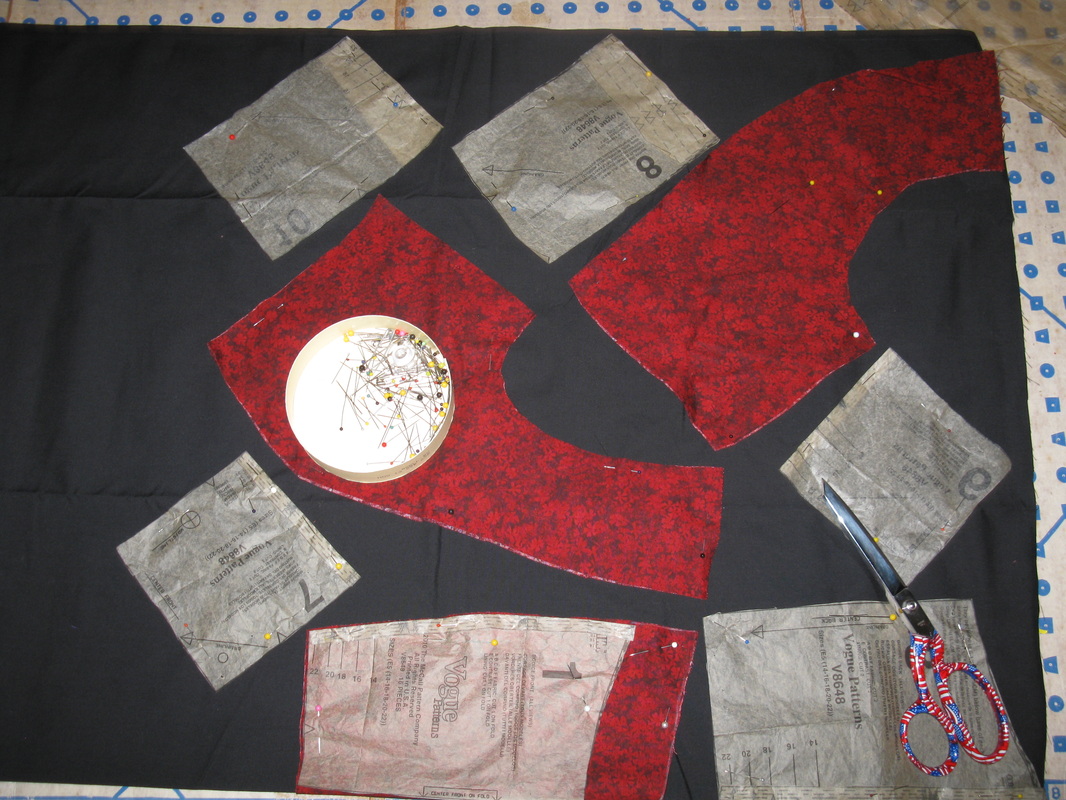
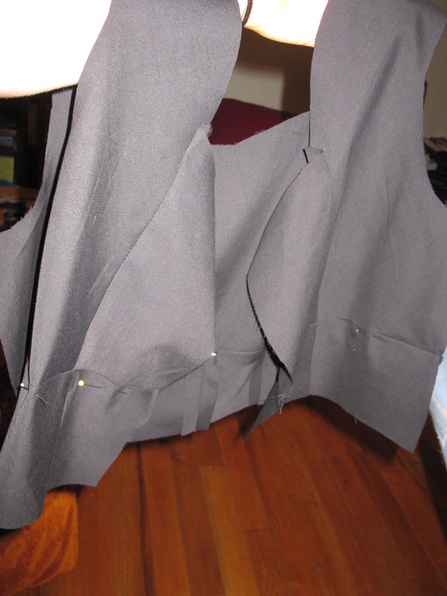
The lining. I used the already cut out pieces as pattern pieces so I would get the arm holes matching...
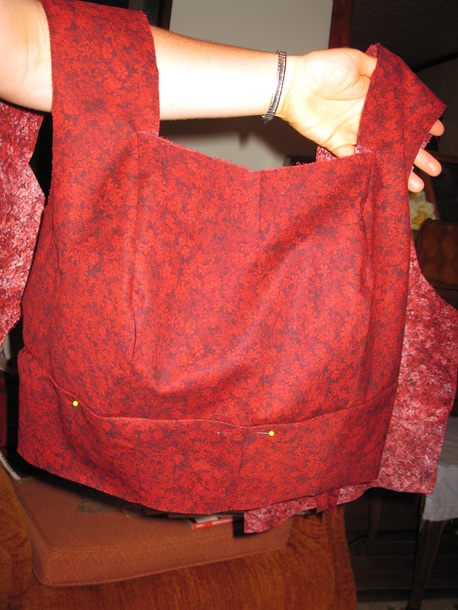
Yes, here's the bodice! :D
And so I started stitching--using a chair for my table and an exercise ball for a seat. (With the amount of air deflated out of that thing it is prefect for my short legs; it is my favorite guitar "stool".)
I ran into a 'problem' with the lining--one of the shoulders was shorter than the other, due to my lack of attention as to how well the material was lined up before I cut. (I usually always double check that sort of thing...) So, I improvised:
I ran into a 'problem' with the lining--one of the shoulders was shorter than the other, due to my lack of attention as to how well the material was lined up before I cut. (I usually always double check that sort of thing...) So, I improvised:
I grabbed a scrap of black and stitched it on, the trimmed it to the proper length and sewed the shoulder together. Turns out I had to take this shoulder up later. *rolls eyes* Oh well, I still needed some extra length anyway!
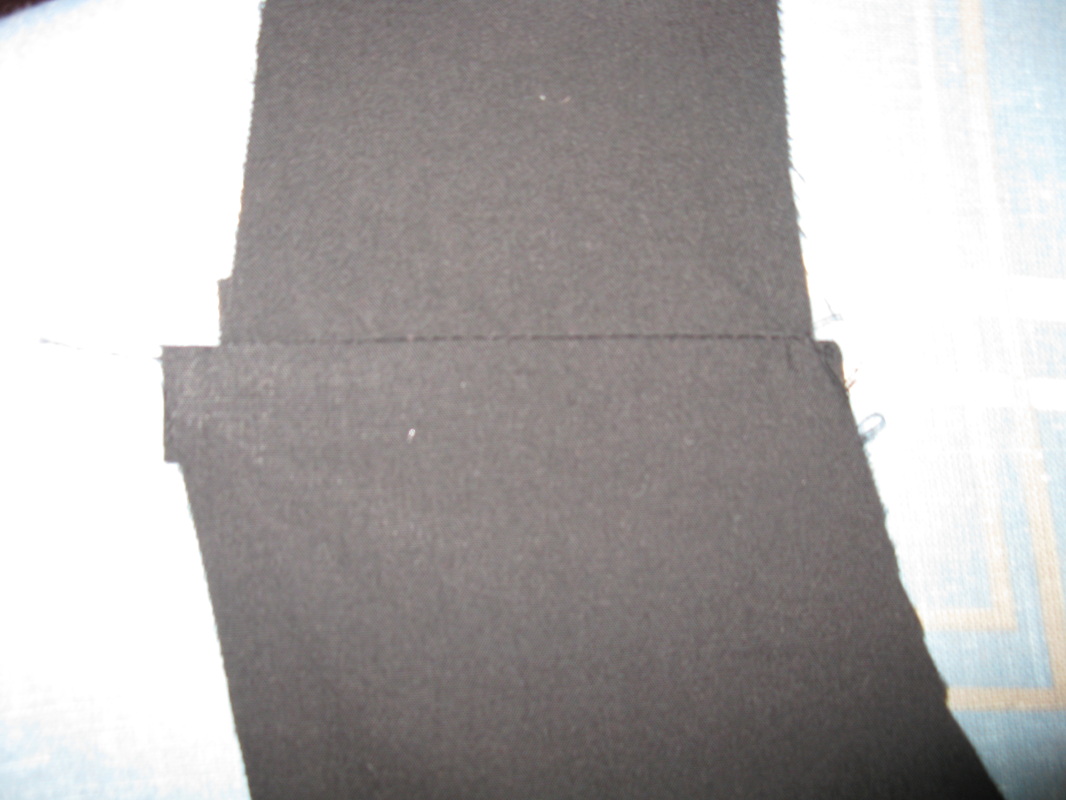
This is what is should have looked like! :P
I sewed together the bodice and the bodice lining, one right after another (I used different colored threads, not that it was completely necessary...) I was getting irritated with the black thread (it wasn't Gutterman's--the best thread by the way!) because it kept snapping on me. At some point I glanced up and there, on the half-wall was a big spool of black Gutterman's. Believe me, I changed the thread immediately!
The bodice.
By the way, those random pins in the mid-riff were simply to hold the seam down. I was going to top stitch like the pattern calls for, but ended up not doing that.
The next step, of course, was to sew the lining to the bodice. When I did across the front, I did a 1/4" seam rather than a 5/8" because I wanted just that extra little bit of height in the front.
Then I sewed the side seams...
The next step, of course, was to sew the lining to the bodice. When I did across the front, I did a 1/4" seam rather than a 5/8" because I wanted just that extra little bit of height in the front.
Then I sewed the side seams...

Very cool picture here...the lace off the dress I was wearing...the subject of the photograph out of focus...And look! My cat-scratch matches! ;P (Heh...)
Next step! Skirt, please...
I took this picture in Mama's mirror...and yes, I know with that red skirt and green dress underneath it, I look something like a Christmas tree...
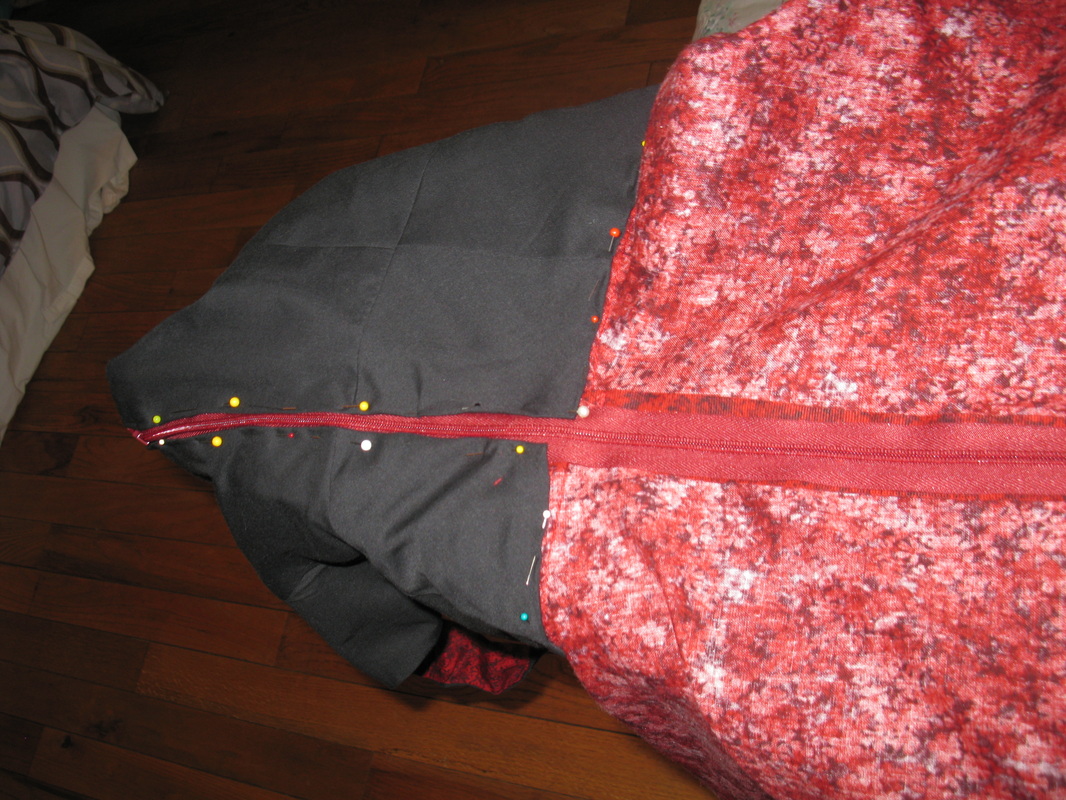
Y'all know what was next, sewing the bodice onto the skirt. I had not sewed up the back of the skirt, so the whole back was open. (This is the way I should have done it when we were helping the W ladies make their dresses back in April--I didn't do a post on that exactly did I? I ought ransack my sister's picture files and borrow some good one's to put up...) Anyway, back to the subject at hand...
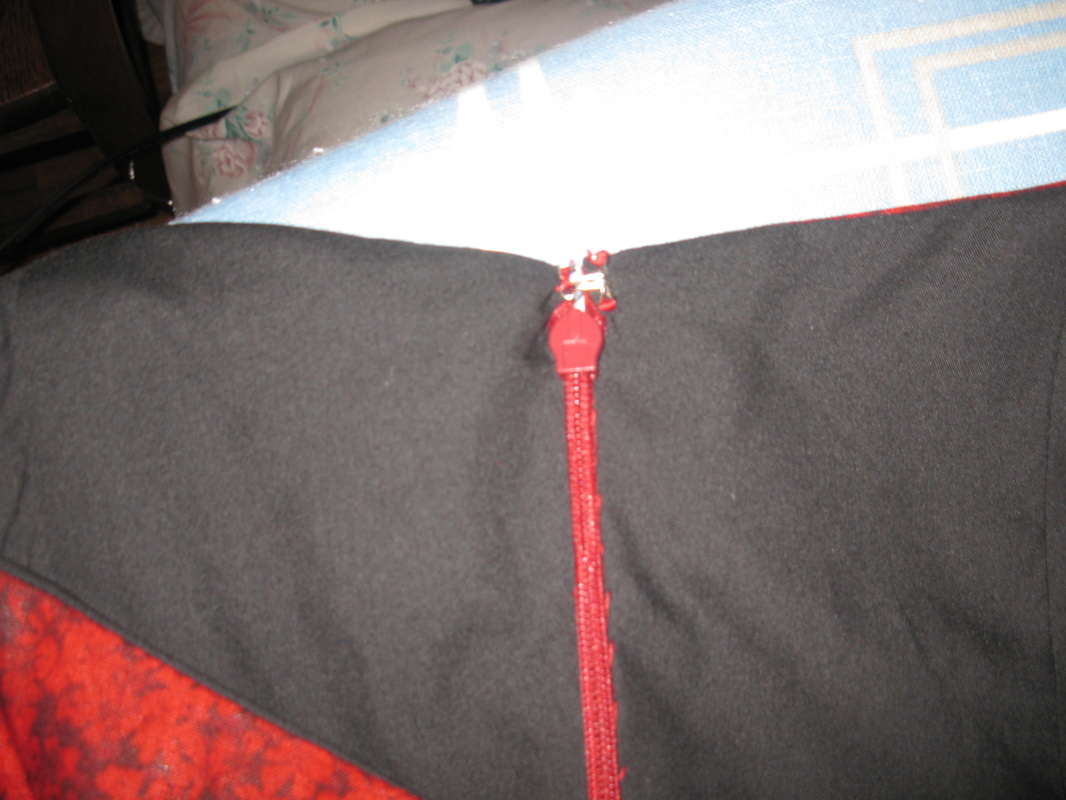
I started to put the zipper in and was almost done with the second side when I realized it wasn't lined up right at the top. I am not quite sure how this happened because I thought I remembered checking that. I guess either I didn't or it slipped. Anyway, I had to rip that side out. I'm a pretty decent hand at ripping, but I don't like to do it. I've had far too much experience at it.
As it would turn out, I should have tried the dress on before I sewed the zipper in because it gaped something awful in the back. I had to rip the zipper out not quite half-way and put that upper part back in so it wouldn't gape any more. Well, maybe I won't do that again anytime soon!
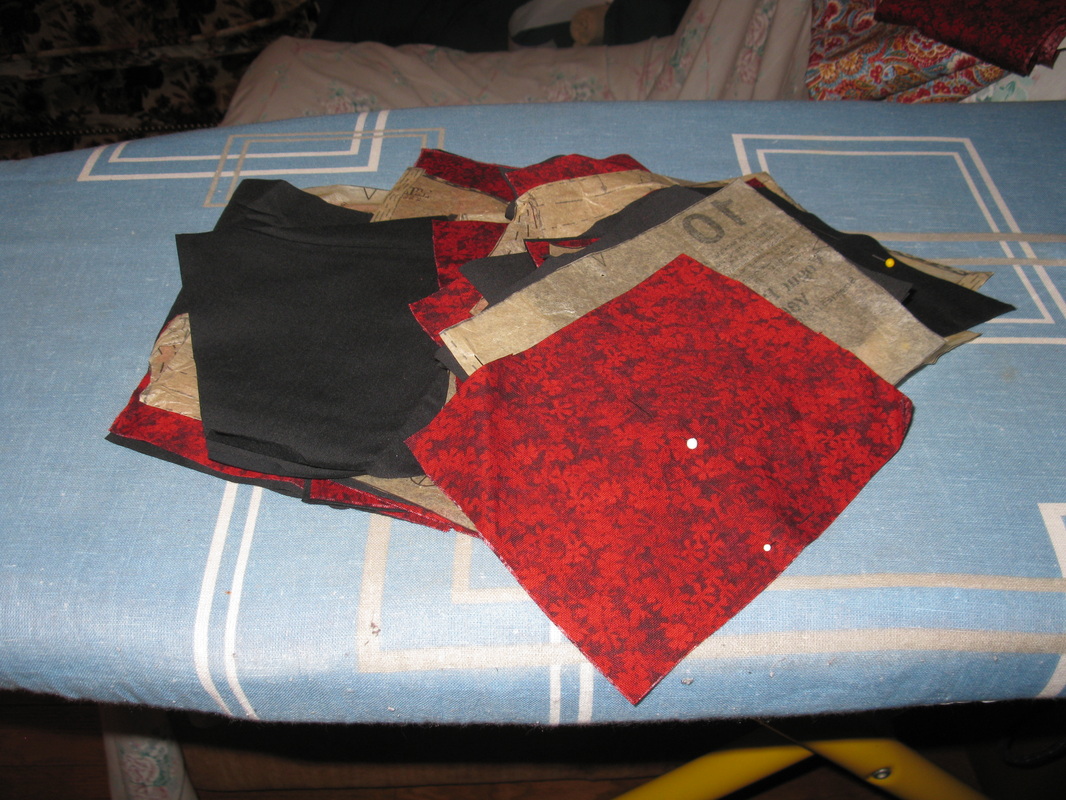
Lining pinned for the hand work.
Lining all stitched down.
After sewing the lining down, it was time to hem the skirt. I made a roughly inch and a half hem. I probably could have pulled off a two inch hem with no problem, but I didn't take it up that much.
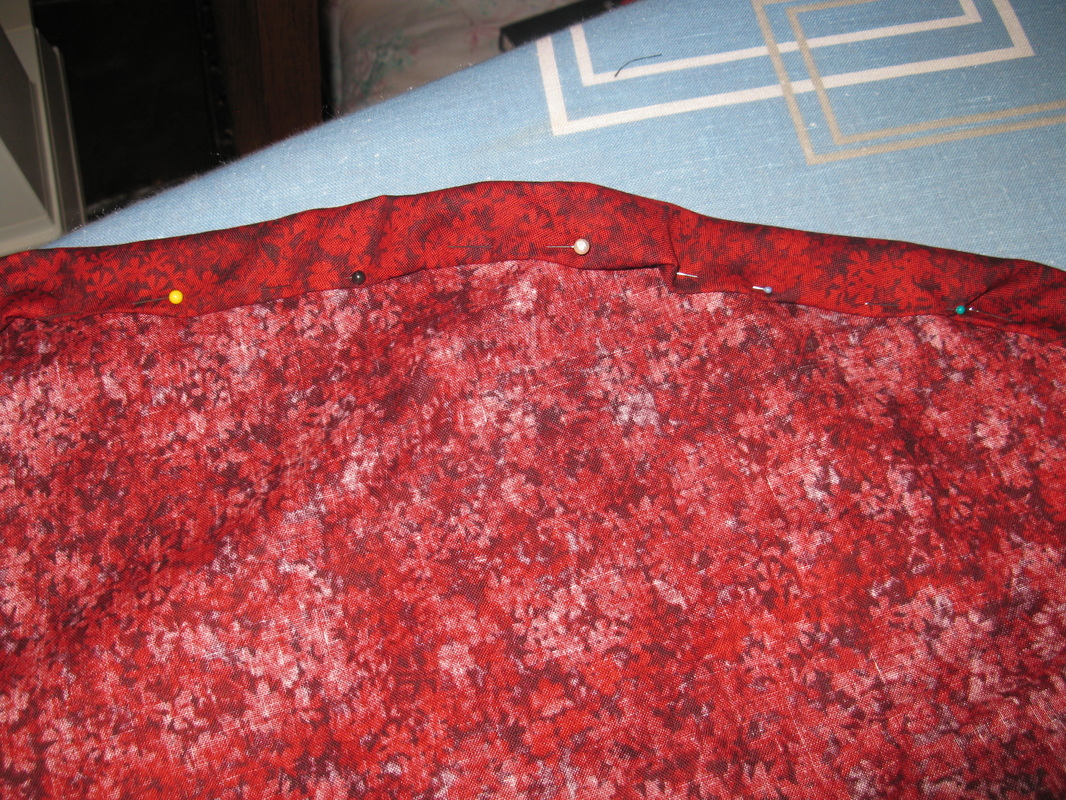
A pinned hem. There is this thing about circular skirts (which this one is--made from four, rather than two panels) and it is that the hems are never completely smooth...you'll always get those little folds while pinning them.
I stitched the hem while eavesdropping as Daddy and a hospice nurse carried on a conversation in the next room. This particular nurse hadn't been here before, so she got the whole story. I was even able to supply a few details. :P
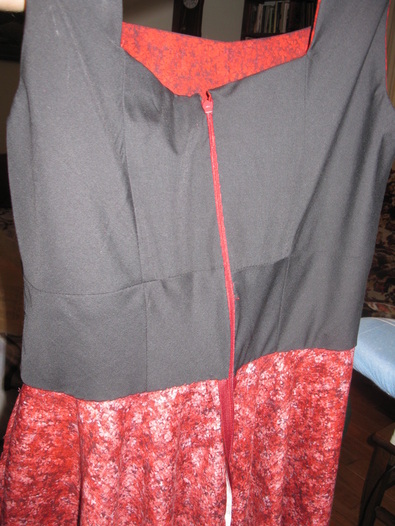
The last thing to do was sew the hook and eye (or a straight catch in this case) at the top of the zipper. I hunted and hunted and hunted and finally located them--after going through the 'craft' drawers in Mama's room two to three times a piece. I found them in the button box...but there were not any black ones--which I really wanted. Anyway, I went ahead and used the silver ones.
The last thing to do was sew the hook and eye (or a straight catch in this case) at the top of the zipper. I hunted and hunted and hunted and finally located them--after going through the 'craft' drawers in Mama's room two to three times a piece. I found them in the button box...but there were not any black ones--which I really wanted. Anyway, I went ahead and used the silver ones.
Sorry, the picture is a little blurry/overexposed, but I think that was THE BEST job I've ever done on a hook and eye. (I hate sewing them on...)
I fully planned on ironing the dress and getting my picture(s) taken last night, but by the time I got done with it it was time for supper and then I had a pile of strawberries to clean. So...I didn't get around to ironing it until this morning:
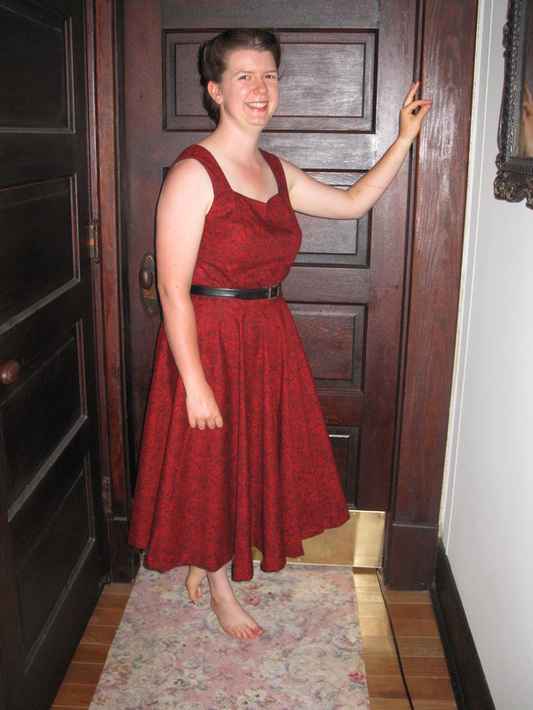
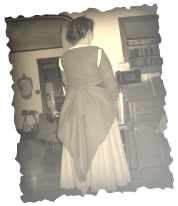
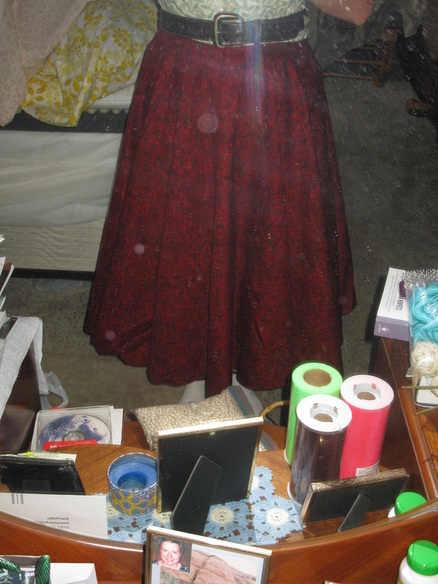
And there 'tis! A hair large (as usual whenever I make something!), but I like it.
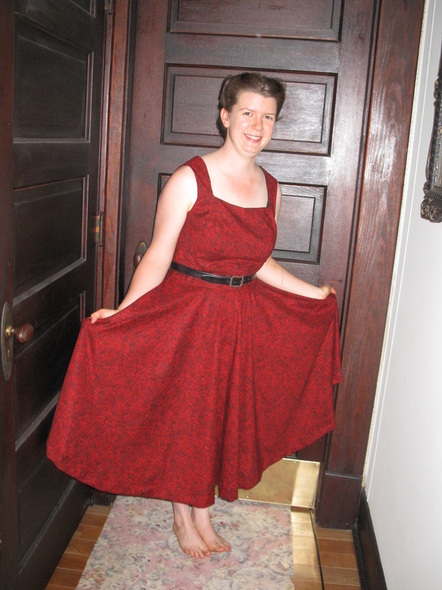
I love the skirt!!

Even though it has a 'mid-riff', this belt lover decided to wear a belt with it. It looks better (on me at any rate) with the belt and kind of hides the fact that the dress is a tag baggy where it shouldn't be.
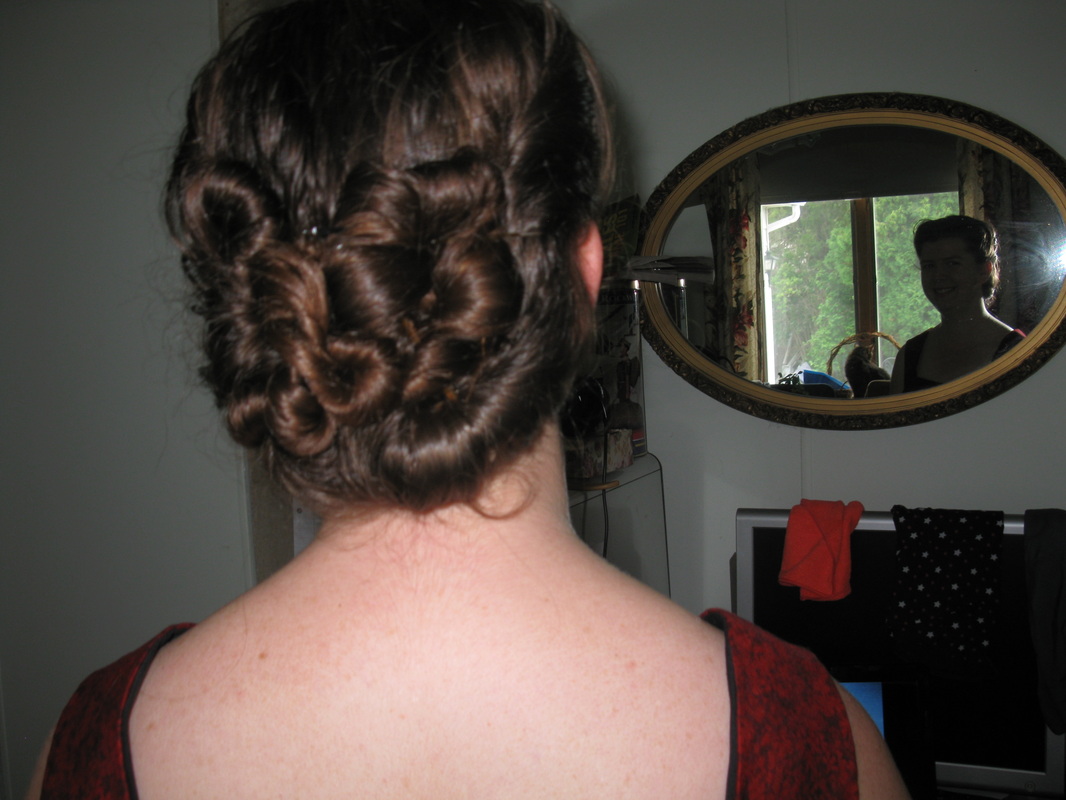
And, just because I'm a goof...here's the hair do I tossed up in an attempt to really capture the 1950's flair that this dress has. (Maybe I can remember how to do this if I want to do it again. Note to self: make sure you hair is damp like it was this morning...)
There...that's the crazy project I took off on this Tuesday and completed yesterday on Wednesday. :)
Speaking of Wednesday...I received something in the mail yesterday that prompts a project all of it's own. :) When I embark on this particular project, be prepared for many odd, squinty expressions which shall not be captured on camera.
Speaking of Wednesday...I received something in the mail yesterday that prompts a project all of it's own. :) When I embark on this particular project, be prepared for many odd, squinty expressions which shall not be captured on camera.
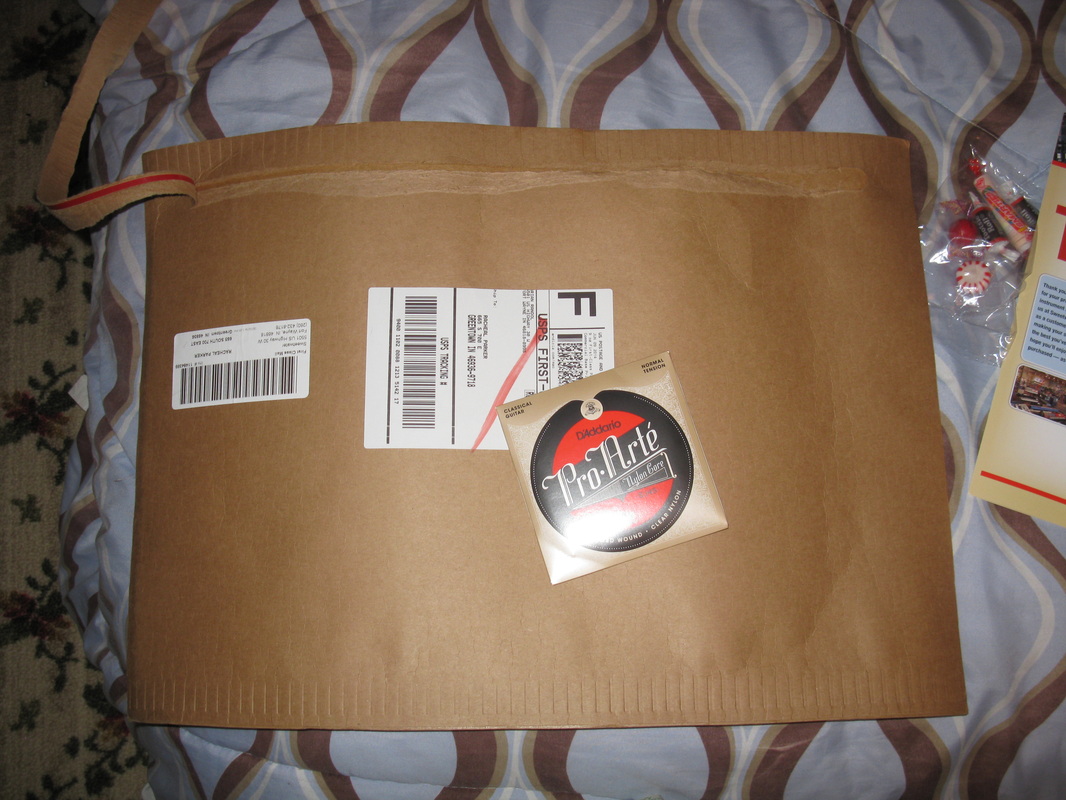
Kind of a mighty big package for a narrow little pack of guitar strings! :D (They have changed the packaging on the D'Addario strings since I bought my last set last year! [April, I think it was...it's been plenty long enough for a new set.])
I look forward to having those new strings on my guitar! (I do not know if I'll get to it this evening or not...)


 RSS Feed